Overview
At Advanced we use SonarQube as our static code analysis tool.
SonarQube is an open-source tool that can scan and identify problems with code quality across several different technology stacks.
SonarQube analysis is typically built directly into our CI/CD processes and provides feedback to the teams as the build is happening.
This provides good information however, the feedback loop can be too slow for rapid development.
One of our current focuses is to improve the feedback loop for developers.
Fortunately, when it comes to SonarQube, they also provide SonarLint, which can be configured directly into your IDE to give that true shift-left mentality.
We use VS Code as our editor of choice across several projects now, so will cover how to get up and running below.
Requirements
To get started you will need
Installation & Global Configuration
Open up VS Code and under extensions install SonarLint
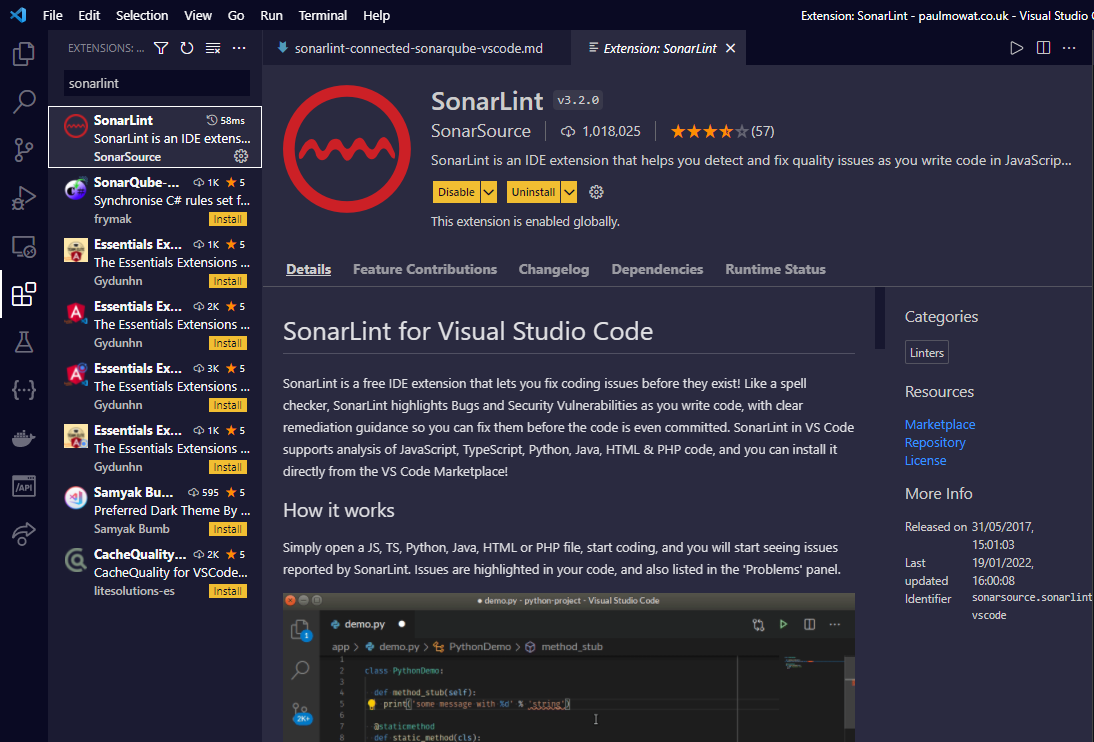
Once installed, restart or reload VS Code to ensure it's taken effect.
If SonarLint can't detect a JAVA JRE on your system, it will prompt you to download one. Let it download if required.
Once VS Code is up and running again, hit Ctrl + Shift + P to open the command palette. Then enter Preferences: Open Settings (JSON) and select to open up your settings.
To get SonarLint working, you need to specify the following settings.
"sonarlint.connectedMode.connections.sonarqube": [
    {
        "connectionId": "sonar", // id of your sonarqube server
        "serverUrl": "https://sonarqube-server.com/", // url of your sonarqube server
        "token": "XXXX" // token to authenticate with sonarqube
    }

],
"sonarlint.pathToNodeExecutable": "C:\\\\Program Files\\\\nodejs\\\\node.exe", // path to your node.js installation if analyzing Javascript/Typescript
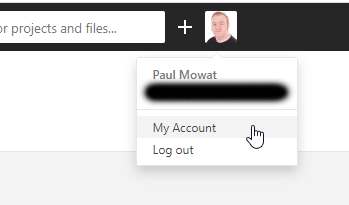
To generate the token, you will need to:
- Login to your SonarQube server
- Click on your profile picture on the top right-hand side of the page and select
My Account
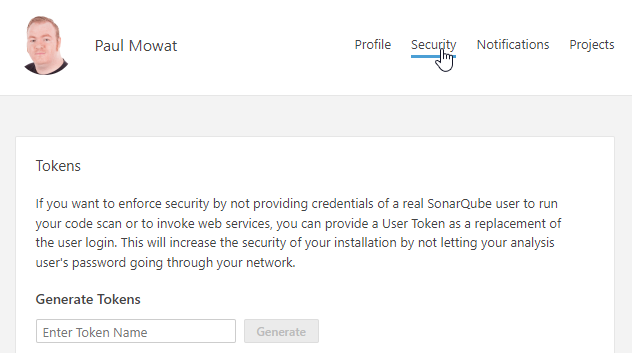
- Next select
Security, specify a token name and hit generate
- Your token will be displayed
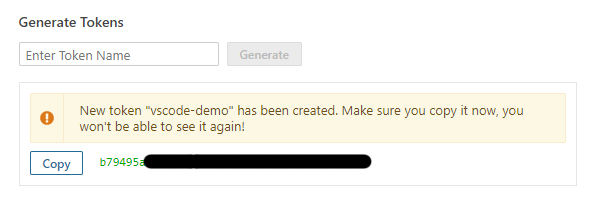
- Copy your token and paste this into the above
tokensetting in VS Code
SonarLint is now configured globally within VS Code to access SonarQube via the specified connectionId.
Workspace Configuration
Next, we need to configure your project workspace to allow it to scan the appropriate SonarQube project.
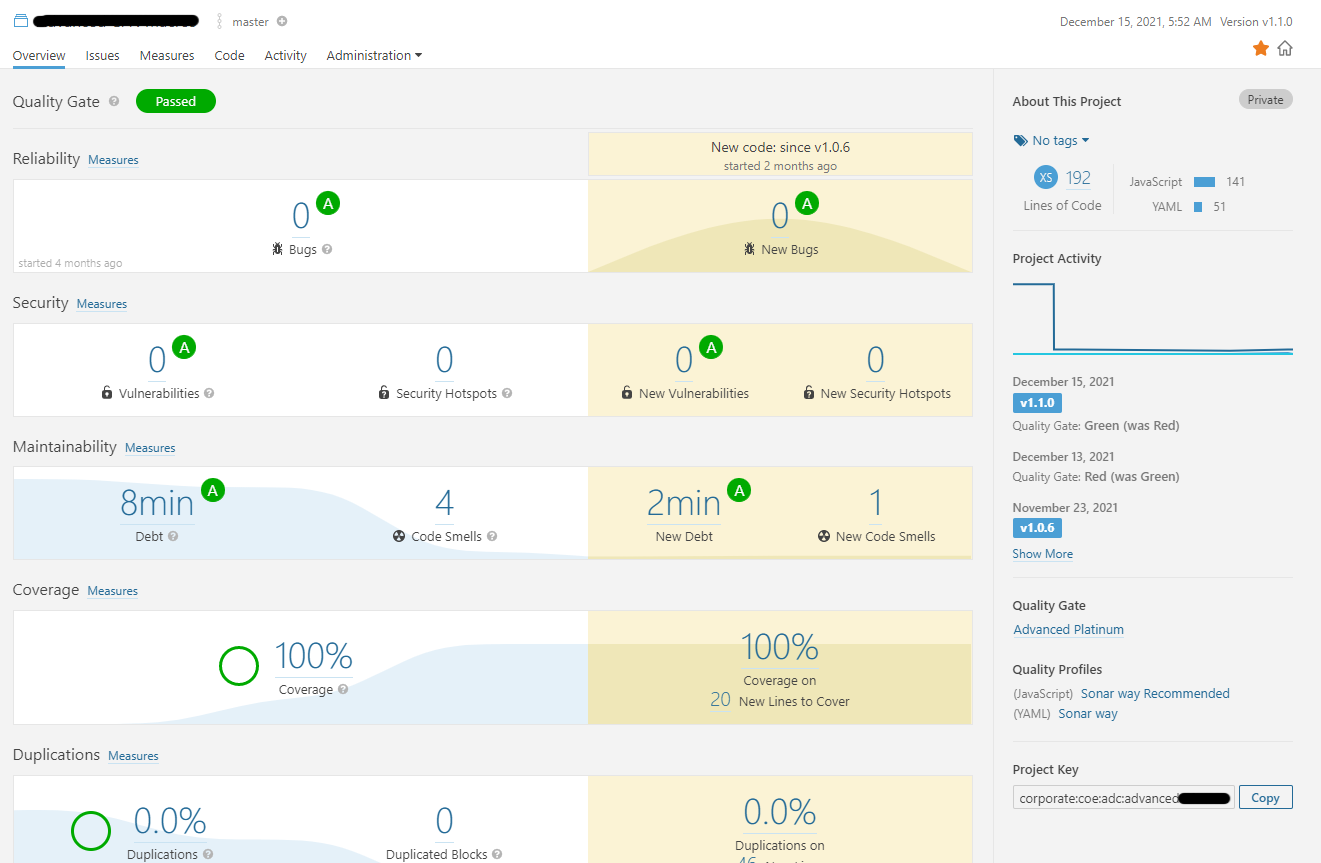
Go back onto your SonarQube server and grab the project key.
This can be found on the project page on the bottom right of the page.
In VSCode hit Ctrl + Shift + P to open the command palette. Then enter Preferences: Open Workspace Settings (JSON) and select to open up your workspace settings.
To get SonarLint working, you need to specify the following settings.
{
  "sonarlint.connectedMode.project": {
    "connectionId": "sonar", // should be same connectionId you defined above
    "projectKey": "XXXX" // Replace with project key you grabbed from SonarQube server
  }
}
We now need to update the SonarLint bindings for the workspace to ensure the rules are in-sync locally and on the server.
Again, hit Ctrl + Shift + P to open the command palette. Then enter SonarLint: Update all bindings to SonarQube/SonarCloud and select. You should see the following message on the bottom right of VS Code once complete.

The project should now be connected and configured.
Verifying
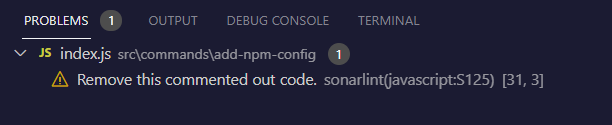
You can verify this by opening up a file that has some problems.
These will now be highlighted within your code:
- With an underline that shows a popup of the issue when hovered over

- Within the VS Code problems panel
You have achieved true shift-left and now have a fast feedback loop allowing you to resolve any SonarQube issues as you code.